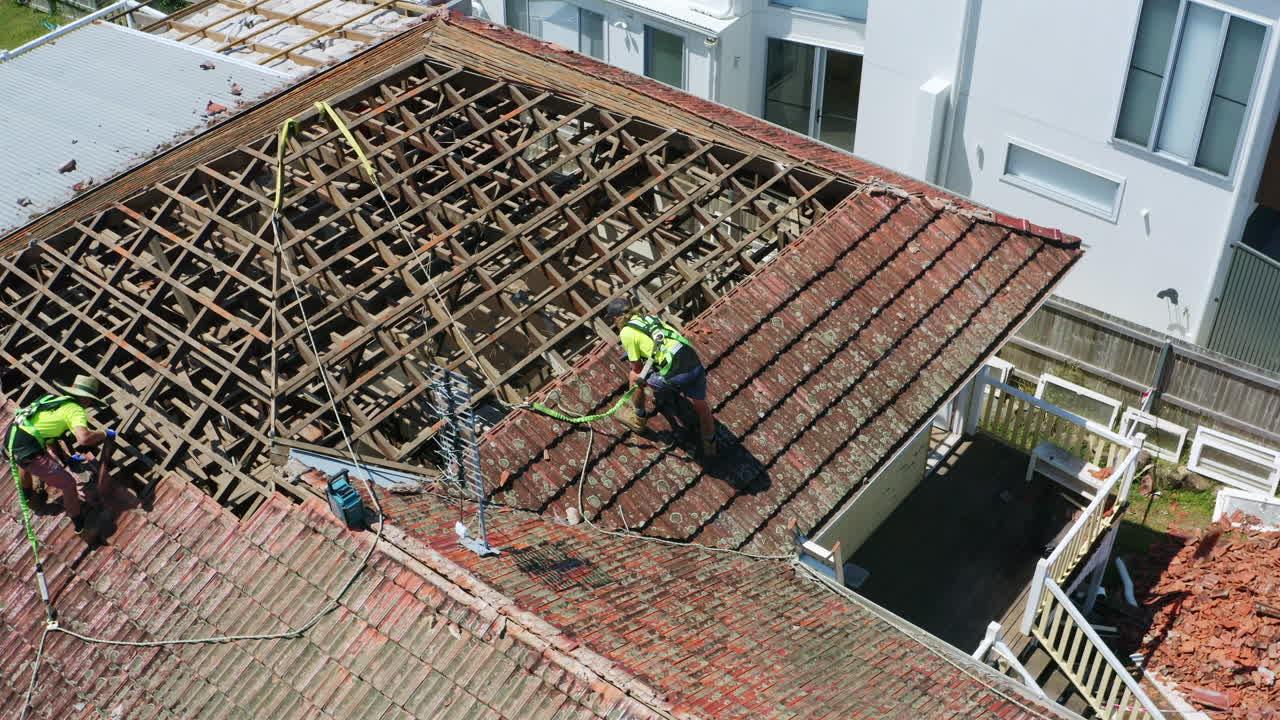
Maintaining the integrity of your roof is essential for protecting your home from the elements. But what happens when a shingle decides to make its escape? Whether it’s due to strong winds or other factors, a missing shingle can leave your roof vulnerable to leaks and other damages. But don’t panic just yet! In this blog post, we will discuss how you can repair roof shingles blown off, providing you with a step-by-step guide to tackle this issue. From temporary fixes to long-term solutions, we’ve got you covered! Can you repair roof shingles blown off? Let’s find out!
How to Fix those Pesky Roof Shingles that Flew Away
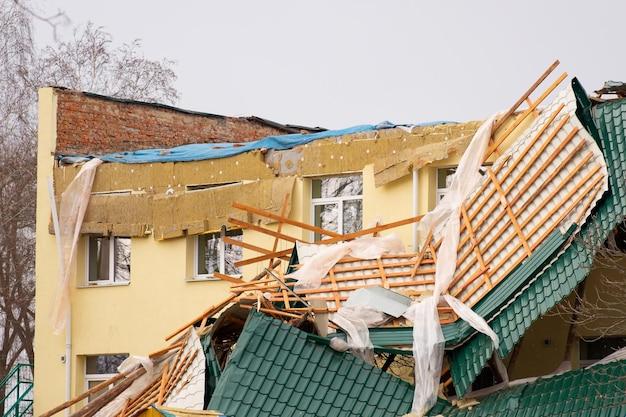
So, Mother Nature decided to play a little game with your roof. She sent a gust of wind that gleefully plucked off your shingles like a kid picking petals off a daisy. Now, you’re left with a somewhat balding rooftop, and it ain’t a good look. Fear not, brave homeowner! We’re here to guide you through the mystical art of bringing your shingles back to their rightful place. But first, let’s assess the damage.
Gathering the Troops: Tools You’ll Need
Before diving into the shingle shuffle, arm yourself with the proper arsenal. Here’s a list of tools that’ll make the job a tad less like battling a dragon:
1. Hammer and Nails: Your Trusty Sidekicks
Your hammer will be your loyal companion in this quest. It’ll help you secure the shingles back in their cozy spots. And the nails? Well, they’re the wingmen, providing the necessary support. Just make sure you have them in sufficient quantities, ’cause running out mid-repair can be a real bummer.
2. Replacement Shingles: New Recruits for the Rooftop Army
To fill in the gaps left by the runaway shingles, you’ll need some new recruits. Grab a bundle of shingles that matches the ones you lost for a seamless blend. Time to give your rooftop its swagger back!
3. Roofing Adhesive: The Magical Stick-it-All
Ah, the glue that holds it all together! Roofing adhesive is your secret weapon to keep those shingles from pulling another disappearing act. It’s like the ninja assassin of roofing materials – you apply it, and suddenly, nothing can escape.
Playing Detective: Search and Rescue
Now that you have your tools ready, it’s time to play a little game of hide-and-seek with your missing shingles. Take a stroll around your property, keep your eyes peeled, and retrieve any shingles that were blown away. They might’ve sought refuge in your yard, gutters, or even your nosy neighbor’s backyard. Give them a gentle pat and reassure them they’re coming home soon.
The Repair Dance: Bringing Shingles Back to Life
Now comes the moment of truth – it’s time to resurrect those shingles and return them to their rightful place. Follow these steps, and you’ll be the hero of your roofing saga:
1. Lift and Remove the Damaged Shingle
Gently lift the shingle above the one you’re fixing using a pry bar or a hammer. Be delicate, as handling shingles requires a gentle touch. Once you’ve freed the damaged shingle, bid it farewell and send it off to shingle heaven.
2. Insert the Replacement Shingle
Slide the new shingle into the vacant spot, ensuring it lines up perfectly with the neighboring shingles. This new recruit will blend seamlessly, like your roof’s very own celebrity impersonator. Nailed it!
3. Nail it Down and Seal the Deal
Use your trusty hammer and nails to secure the new shingle in place. Drive a nail through each corner, ensuring it’s snug but not so tight that you risk damaging the shingle. Once it’s in position, apply a dab of roofing adhesive under the shingle to ensure it stays put, even in the face of future wind tantrums.
You Did It! A Roof Restored
Congratulations, brave homeowner! You’ve successfully repaired those runaway shingles and brought harmony back to your rooftop. Your shingles are snuggled together, ready to protect you from rainstorms and resist any wind’s teasing temptations. Now you can rest easy, knowing you have conquered the art of shingle restoration. Time to celebrate with a well-deserved cup of tea or a dance party on the rooftop – it’s your call!
One Shingle Flew the Coop: How to Handle a Mischievous Roof
So, one lovely day, you head outside to admire your beautiful abode, only for your eyes to widen in shock as you notice that one shingle has taken a daring leap from your roof and is now playing hide-and-seek with the wind. Oh, the audacity! Fear not, my friend, for I shall guide you through this unexpected game of roof repair.
A (Not So) Stormy Affair
Before we delve into the rescue mission, let’s identify the prime suspect; why did that pesky shingle decide to pull a Houdini move? Inclement weather, especially strong winds, can easily snap the bonds holding shingles in place, gifting us with this delightful spectacle. While it may be tempting to blame mischievous squirrels or stealthy roof ninjas, nature is often the culprit of such hi-jinks.
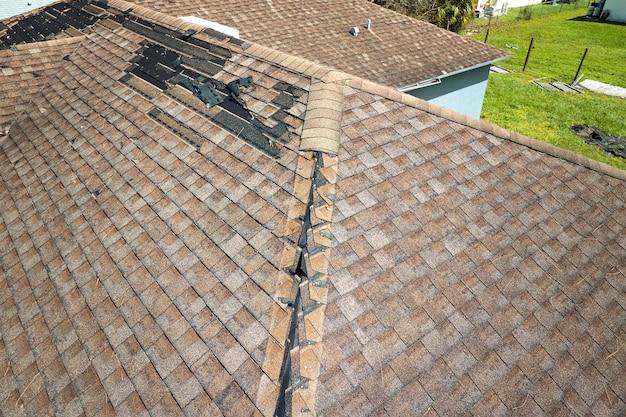
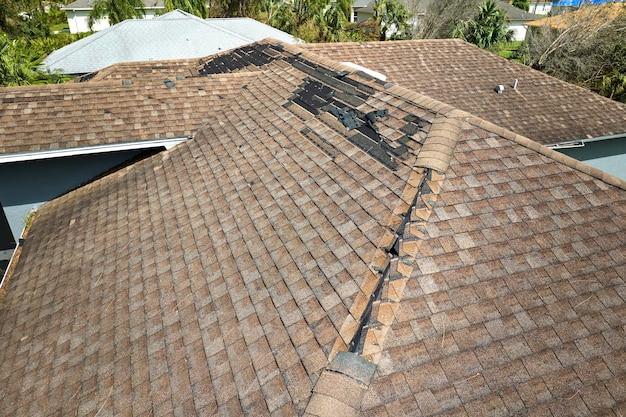
Assessing the Damage
Once you’ve regained your composure after the shingle’s trapeze act, it’s time to assess the situation. Carefully examine the area where the runaway shingle once called home. Look for any signs of additional damage or other shingles contemplating their own bid for freedom. Keep an eye out for cracks, tears, or loose nails, which could indicate a more extensive issue.
The Heroic Intervention
Now, it’s time for you to channel your inner superhero and become the fearless savior of your roof. Don your trusty safety gear, grab a sturdy ladder, and embark upon this noble mission. Determine the exact location from which the shingle took flight and inspect the neighboring shingles, ensuring they’re cozy and tightly bonded.
Tools of the Trade
As you venture forth on your roof rescue escapade, arm yourself with the essentials: a hammer, roofing nails, a pry bar, and extra shingles, just in case the whole gang decides to make their escape. You’ll also need a generous amount of patience and a whole lot of love for your humble abode.
Shingle Reincarnation
With all your tools at the ready, it’s time to coax that naughty shingle back to its rightful place. Gently lift the shingle above the wayward one and apply a smidgen of roofing cement to secure it back in line. Depending on the situation, you may need to remove the damaged shingle altogether and replace it with a shiny new one.
Preventing Future Escapes
Congratulations, dear homeowner, for triumphing over the rogue shingle! But wait, do you hear the sound of tiny feet tip-toeing across your roof? Fear not, for there are measures you can take to minimize future shingle escapes. Consider reinforcing your shingles with adhesive strips or opting for a professional inspection to ensure everything is shipshape.
Farewell to Shingle Shenanigans
You have emerged victorious from this test of wills with the rebellious shingle. As you descend from your roof, gaze upon your accomplishment with pride, knowing that your roof is intact and your home is secure once more. Remember, should another shingle attempt to journey to lands unknown, you are now equipped with the knowledge and skills to coax it back home. Hail to the conquering roofer in you!
Temporary Fix for Missing Shingles
Before attempting a temporary fix for missing shingles, it’s essential to assess the damage first. Ensure there are no underlying issues with your roof, such as leaks or structural damage. This step will prevent any surprises while you’re trying to fix the problem and save you from potential mishaps.
Raid Your Toolbox
Time to channel your inner handyman or woman! Grab a ladder, a sturdy broom, gloves, nails, and a hammer. Also, dress appropriately because this is your chance to rock that stylish DIY attire. Remember, fashion and home repair can go hand in hand.
Look for Spare Shingles
Ah, the elusive spare shingles! Some people have drawers full of them, while others have none. Don’t worry; there’s a solution for both cases. If you’re lucky enough to have spare shingles lying around, dust them off and pat yourself on the back. For those without spare shingles, fear not; we’ve got you covered.
Get Crafty with Household Items
Okay, it’s time to unleash your creativity. Grab some aluminum foil and cut out a piece slightly larger than the missing shingle. Fold it to mimic the shape and size of the shingle, and voila! You have yourself a homemade replacement. Now, I know what you’re thinking. Aluminum foil on the roof? Isn’t that a bit unconventional? Well, yes, but desperate times call for desperate measures, my friend!
Make it Weatherproof
To ensure your temporary fix withstands the elements, you need to secure it properly. Position the spare shingle or the aluminum foil replacement over the gap. Use nails and a hammer to secure it, making sure it’s snug and won’t fly away at the slightest gust of wind. Be precise with your aim, because we wouldn’t want your thumb to meet the hammer accidentally. Ouch!
Celebrate Your Success
Now that your shingle is temporarily fixed, it’s time to bask in your glory. Take a step back, admire your handiwork, and give yourself a pat on the back. Congratulate yourself on becoming a temporary roofing expert. Who needs professionals when you have your DIY skills?
Remember, It’s Temporary
As the saying goes, all good things must come to an end. A temporary fix is just that – temporary. It’s crucial to keep this in mind and plan for a permanent solution. Schedule an appointment with a professional roofer to assess and repair the damage properly. They’ll have the knowledge and expertise to ensure your roof remains intact for the long haul.
In the world of DIY roof repairs, a temporary fix can be a lifesaver. With a bit of ingenuity and resourcefulness, you can effectively address missing shingles and prevent further damage. Just remember, while a temporary fix is a great short-term solution, it’s still temporary. For a lasting result, consult a professional. Until then, keep those spare shingles or aluminum foil close by – you never know when you’ll need them again!
Can You Repair Roof Shingles Blown Off
So, a gust of wind swooped down and decided to play a game of roof shingle pickup without your consent. Frustrating, I know. But before we dive into the repair process, let’s take a moment to assess the extent of the shingle apocalypse. Are we talking about a single lost soldier or an entire battalion of shingles that have abandoned ship?
Gather Your Tools, or Make Friends with Your Neighbor’s Toolbox
Now that you’ve come to terms with the situation, it’s time to gather your repair arsenal. You’ll need a few trusty items, such as a ladder (preferably one that doesn’t have a vendetta against stability), a pry bar (also known as a shingle ripper), roofing nails, a hammer, and some spare shingles. If you don’t have these tools lying around, it might be a good opportunity to strike up a friendship with that handy neighbor of yours. They probably have everything you need, and maybe even a few tips on fixing shingles blown off. Don’t be shy, just remember to use your charming personality!
Climb That Ladder, But Not Like Spider-Man
Safety first, my friend! Climb up that ladder with grace, making sure it’s secure and positioned correctly. Contrary to what movies might have you believe, we’re not here to imitate Spider-Man or any other daredevil. Safety is sexy, my friends!
Time to Remove the Haters (Oops, I Mean the Damaged Shingles)
This is where your pry bar enters the scene. Gently slide it under the damaged shingle and carefully lift the surrounding shingles to expose the nails. Now, don’t go all Hulk on them; just remove the nails with a gentle touch. We’re not interested in destructive tendencies here. Once freed, bid a fond farewell to the fallen shingle and set it aside for a lovely funeral ceremony, or simply toss it in the garbage. Your call.
Replacement Speaks Louder than Super Glue
With the damaged shingle out of the picture, it’s time to replace it with a shiny new recruit. Grab that spare shingle and slide it into place, making sure it aligns perfectly with its neighboring shingles. Now, secure it with some roofing nails, using your gentle hammering skills. Be patient, my friend, and avoid the temptation to go full Thor on those nails! We’re aiming for a delicate touch.
Admire Your Handiwork, and Embrace the Sheer Brilliance of Roof Shingle Restoration
Step back, admire your masterpiece, and bask in the awe-inspiring presence of your repaired roof. You did it! Embrace your newfound talent for fixing roof shingles blown off with grace and finesse. But remember, it doesn’t hurt to keep an eye on those shingles in the future. They might be planning another escape attempt!
Feel Like a Pro, Even When You’re Not
Congratulations on successfully completing your shingle repair mission! You’ve conquered the chaos, armed with nothing but determination and a few tools. Now, go forth, and spread the wisdom of roof shingle restoration to those in need. You’re a hero among homeowners, my friend.