Welcome to our comprehensive guide on pressure testing PEX, the flexible and durable plastic piping system widely used in plumbing installations. Whether you’re a professional plumber or a DIY enthusiast, it’s crucial to ensure the integrity and reliability of your PEX pipes through a proper pressure test. In this blog post, we will cover everything you need to know about pressure testing PEX and provide you with step-by-step instructions to ensure a successful test.
From understanding the importance of pressure testing and knowing the allowable limits, to learning the different methods and tools required, we will explore all the essential aspects of pressure testing PEX pipes. Additionally, we will address common FAQs and concerns, including how to detect leaks and what to do if your PEX fittings fail the test. So, if you’re ready to master the art of pressure testing PEX, let’s dive in and ensure your plumbing system is sound and secure.
Note: This introduction section is written in markdown format.
How to Conduct a Pressure Test on PEX Pipes
When it comes to plumbing, one can never be too careful, especially when installing PEX pipes. PEX, short for cross-linked polyethylene, has gained popularity in recent years for its durability and flexibility. However, it’s crucial to ensure that your PEX installation can withstand the pressure before it turns into a high-pressure disaster zone. In this guide, we’ll walk you through the process of pressure testing PEX pipes like a pro.
Tools and Supplies You’ll Need
Before we dive into the nitty-gritty of pressure testing your PEX pipes, make sure you have these essential tools and supplies ready:
-
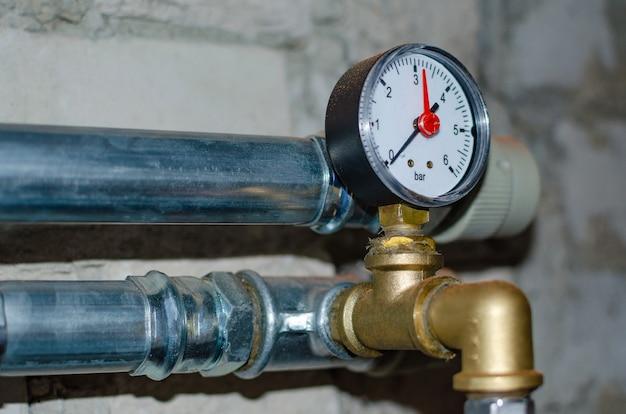
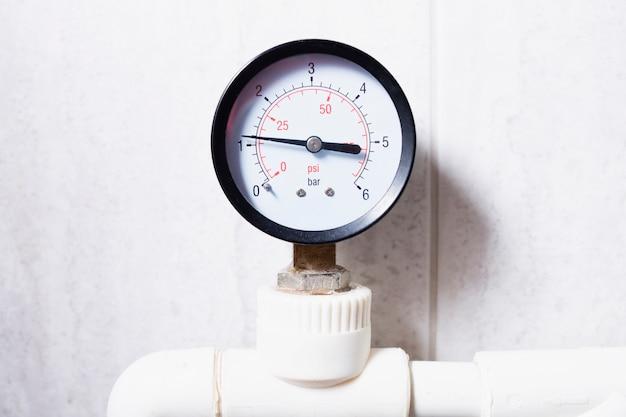
Pressure Gauge: Get your hands on a reliable and accurate pressure gauge to measure the water pressure inside your pipes.
-
Water Supply: Ensure a steady flow of water for the test, either from your main water line or a separate water source.
-
Stop Valves: Install stop valves at strategic points to isolate specific sections of your plumbing system during the test.
-
Plugs and Caps: Utilize plugs and caps to seal off open ends of the PEX pipes and maintain pressure within the testing zone.
Now that you have your ducks in a row, let’s get down to the nitty-gritty of pressure testing those PEX pipes.
Step 1: Prepare for the Test
First things first, shut off the main water supply and make sure there isn’t any water flowing through the pipes. It’s like putting your pipes on hold until they’re ready for their big moment. Once the system is dry, close all stop valves and install plugs or caps on any open ends to create a closed loop.
Step 2: Establish the Baseline Pressure
Next up, it’s time to determine the baseline pressure of your plumbing system. Connect the pressure gauge to a water source, ideally the main water line or an accessible faucet. Open the valve slightly and let the water flow. Keep an eye on the pressure gauge until it stabilizes. Voila! That’s your baseline pressure.
Step 3: Build Up the Pressure
With the baseline pressure established, it’s time to pump up the volume. Slowly introduce water into the closed loop by gradually opening one of the stop valves. Keep an eagle eye on the pressure gauge and look out for any sudden spikes or drops. We don’t want any surprises here!
Step 4: Monitor for Leaks and Hold Steady
Once you’ve reached your desired pressure, it’s showtime! You’ve built up the pressure, and now it’s time to make sure your PEX pipes can handle the heat. Monitor the pressure gauge closely for any signs of leakage. Just like a detective, look out for drops in pressure or any suspicious activity. If the pressure holds steady, it’s a good sign your PEX pipes are A-okay.
Step 5: Release the Pressure
Congratulations, you’ve survived the pressure test! Now it’s time to release the pressure and let your pipes take a breather. Gradually close the stop valve to decrease the pressure, ensuring a smooth and controlled release. Once you’ve reached zero pressure, take a moment to appreciate your plumbing prowess.
Step 6: Inspect and Celebrate
Now that the pressure is off, it’s time for a victory lap! Inspect your PEX pipes for leaks, cracks, or any signs of weakness. Celebrate the successful pressure test with a little dance, a cheer, or even a self-high-five. You did it!
Remember, pressure testing your PEX pipes is a crucial step to guarantee a leak-free plumbing system. So don’t skip it! With these step-by-step instructions, you’ll be able to pressure test your PEX pipes like a pro. Happy plumbing!
FAQ: How To Pressure Test PEX
Frequently Asked Questions About Pressure Testing PEX Pipes
In this FAQ-style section, we will address common questions related to pressure testing PEX pipes. Whether you’re a seasoned plumber or a DIY enthusiast, this comprehensive guide will help you understand the ins and outs of pressure testing and ensure your PEX system is secure. So let’s dive right in!
How long should you pressure test PEX piping?
The ideal duration for pressure testing PEX pipes can vary depending on the specific project and local regulations. However, a general rule of thumb is to maintain pressure for at least 15-20 minutes. This should provide sufficient time to detect any leaks and ensure the integrity of your PEX system.
How do you conduct a rough-in plumbing test?
To perform a rough-in plumbing test, you’ll need to connect a pressure gauge to your PEX piping system. After pressurizing the system, closely monitor the pressure gauge for any fluctuations or drops. If the pressure remains stable over a designated period, typically 15-20 minutes, your PEX rough-in plumbing is likely sound.
Where is PEX not permitted?
While PEX is widely accepted as a reliable plumbing material, it’s essential to be aware of local building codes and regulations. Some areas restrict or prohibit the use of PEX in specific applications, such as outdoor burial or commercial buildings. Always consult with local authorities or licensed professionals to ensure compliance with local plumbing standards.
Is SharkBite PEX expandable?
Yes, SharkBite PEX tubing is expandable to some extent. The Expansion PEX system offered by SharkBite utilizes a special tool that stretches the PEX pipe and allows for the insertion of fittings without the need for additional crimping or clamping. This expansion feature can simplify installations and ensure secure connections.
How do you perform a pressure test on PEX piping?
To pressure test your PEX piping system, you’ll need to close all valves and caps and pressurize the lines using air or water. Monitor the pressure gauge for any drops or fluctuations, indicating potential leaks. Conduct a visual inspection of all connections and fittings to identify potential issues.
Can PEX pipes be tested with compressed air?
While water is the most common medium for pressure testing PEX pipes, compressed air can also be used. However, it’s crucial to follow manufacturer instructions and local codes to ensure safe and accurate testing. Always exercise caution when using compressed air and release pressure gradually to prevent damage.
How can I check my water pressure without a gauge?
If you don’t have access to a pressure gauge, there’s a simple yet effective technique to estimate your water pressure. Fill a container with a known volume, such as a one-gallon bucket, as quickly as possible using a faucet connected to the water line you want to test. Measure the time it takes to fill and use a simple formula (Volume / Time) to calculate your approximate water pressure.
How do you pressure test PVC pipes?
To pressure test PVC pipes, follow a similar procedure as with PEX piping. Close all valves and caps, ensure the system is watertight, and pressurize using air or water. Apply the desired pressure, typically between 10-15 psi, and carefully monitor the pressure gauge for any significant drops or fluctuations.
How do you pressure test a water line?
Pressure testing a water line involves pressurizing the pipes to ensure there are no leaks or faults. By closing all valves and caps, introducing pressurized water or air, and monitoring the pressure gauge for any changes, you can determine if your water line is sound and secure.
How can you identify leaks in a PEX system?
To identify leaks in your PEX system, there are a couple of methods you can try. You can visually inspect all fittings, connections, and joints for any signs of moisture or water droplets. Alternatively, you can use a soapy water solution and apply it to the suspected area, looking for bubbles that indicate a leak.
How long should plumbing hold air pressure?
When conducting an air pressure test on plumbing, it’s generally recommended to maintain pressure for a minimum of 15-20 minutes. This duration allows sufficient time to detect any potential leaks and ensures the plumbing system’s integrity.
What is considered a failed pressure test?
A failed pressure test occurs when the pressure drops significantly during the testing period or doesn’t hold steady within an acceptable range. This drop indicates the presence of leaks or faults within the plumbing system that require investigation and repair before proceeding with further installations or connections.
How much water pressure can PEX tubing withstand?
PEX tubing is designed to withstand high water pressures, making it incredibly durable and reliable. Depending on the specific PEX type and diameter, it can typically handle water pressures up to 80 psi. Always consult the manufacturer’s specifications to ensure the proper usage and limitations of your particular PEX tubing.
How do you conduct a pressure test on PEX pipes?
To pressure test PEX pipes, follow these steps:
- Close all valves and caps.
- Connect a pressure gauge to the system.
- Pressurize the PEX lines using water or air.
- Monitor the pressure gauge for any fluctuations.
- Check all connections and fittings visually for potential leaks or issues.
Will PEX tubing hold air pressure?
Yes, PEX tubing has the ability to hold air pressure adequately during a pressure test. However, it’s important to note that water is the preferred medium for pressure testing PEX pipes due to its higher density and reduced risk of damage to the system.
How do you perform a soundness test in plumbing?
A soundness test in plumbing is essentially a pressure test performed to ensure the integrity and reliability of the plumbing system. By pressurizing the pipes, whether with air or water, and monitoring the pressure gauge for any drops or fluctuations, you can determine if the plumbing system is sound and secure.
Now that you have a comprehensive understanding of pressure testing PEX pipes, you’re well-equipped to tackle any plumbing project confidently. Remember to follow proper procedures, adhere to local codes, and consult with professionals when needed. By ensuring the soundness of your PEX system, you can enjoy worry-free plumbing and peace of mind.