Are you tired of dealing with dust, debris, or paint splatters while working on home improvement projects? Hanging plastic sheeting from the ceiling can provide a quick and effective solution to protect your space. In this comprehensive guide, we’ll explore various techniques and tips to help you successfully hang plastic sheeting and create a barrier that keeps unwanted mess at bay.
Whether you’re a seasoned DIY enthusiast or just starting out, this blog post will cover everything from choosing the right tape to attaching plastic sheeting to the ceiling and walls. We’ll also discuss the benefits of plastic drop sheets and their ideal applications. Additionally, we’ll delve into the world of zip walls and offer insights into how they can revolutionize your dust control efforts.
Save time, money, and effort by following our expert advice and make your home improvement projects cleaner and more efficient. Let’s dive into the nitty-gritty of hanging plastic sheeting and embrace a dust-free environment.
Keywords: hanging plastic sheeting, tape for hanging plastic sheets, plastic drop sheets, zip wall, dust control, home improvement
How To Install Plastic Sheeting From the Ceiling Like a Pro
When it comes to hanging plastic sheeting from the ceiling, you might think it’s a daunting task. But fear not, because we’ve got your back! In this guide, we’ll show you how to tackle this project like a pro. So, roll up your sleeves, grab your tools, and let’s get started!
Gather Your Materials
Before we dive in, let’s make sure you have all the necessary materials on hand. Here’s what you’ll need:
1. Plastic Sheeting
First things first, you’ll need high-quality plastic sheeting. Make sure to choose a durable material that suits your project’s needs. Measure the area you want to cover, and don’t forget to add a few extra feet for trimming and securing.
2. Measuring Tape
A reliable measuring tape is crucial to ensure accurate dimensions. Trust us; you don’t want to end up with a plastic sheet that’s too short or too long for your ceiling!
3. Scissors or Utility Knife
You’ll need a sharp pair of scissors or a utility knife to cut the plastic sheeting to your desired size. Safety first, though! So, be cautious and avoid any accidents while handling sharp tools.
4. Adhesive or Staple Gun
To secure the plastic sheeting to the ceiling, you can use adhesive or a staple gun. The choice depends on your preference and the nature of your project. Just ensure the adhesive you choose is compatible with plastic.
5. Ladder or Step Stool
Unless you happen to be a towering giant, you’ll need a reliable ladder or a sturdy step stool to reach the ceiling. Safety should be your top priority, so make sure your ladder is stable and in good condition.
Prepping for Success
Now that you have all your materials ready, let’s dive into some prep work before we start hanging the plastic sheeting.
Measure Twice, Cut Once
You’ve probably heard this advice countless times, but it’s worth repeating. Before you even think about cutting your plastic sheeting, double-check your measurements. Trust us; it’ll save you a ton of frustration down the line.
Clear the Area
Make sure the area you’re working in is clear of any obstacles or debris. You don’t want to accidentally trip over a rogue tool or step on something sharp. A clean workspace is a safe workspace!
Get a Helping Hand
Hanging plastic sheeting from the ceiling can be a bit tricky solo. If possible, enlist the help of a friend or family member. Not only will it make the process smoother, but it’ll also give you someone to share a laugh with when things don’t go as planned.
Hanging the Plastic Sheeting
Now that we’ve prepped like pros, it’s time to get that plastic sheeting up on the ceiling!
Step 1: Positioning
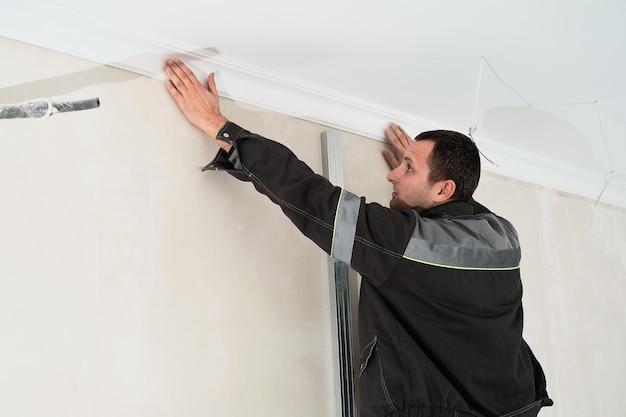
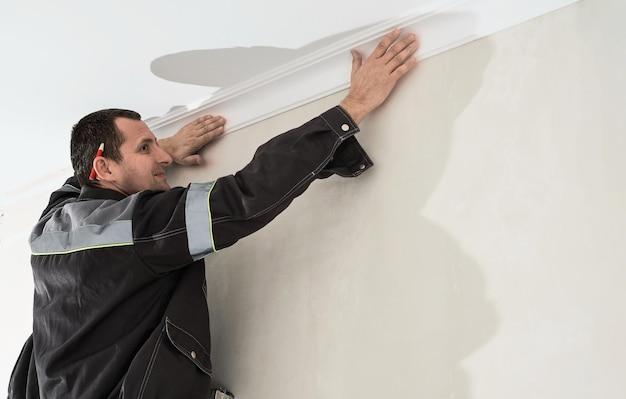
Start by positioning your ladder or step stool in a safe and stable spot. Climb up and carefully hold the plastic sheeting against the ceiling, making sure it’s aligned with your measurements.
Step 2: Securing with Adhesive
If you’ve opted for adhesive, apply it to the corners and edges of the plastic sheeting. Take your time and ensure the adhesive is evenly spread. Then, press the plastic sheeting firmly against the ceiling, smoothing out any wrinkles as you go.
Step 3: Securing with a Staple Gun
For those using a staple gun, simply staple the plastic sheeting to the ceiling at regular intervals. Again, start with the corners and edges, then work your way towards the center. Take care not to staple too tightly, as it may cause the plastic to tear.
You’ve Mastered the Art!
Congratulations, you’ve successfully installed plastic sheeting from the ceiling like a pro! Take a step back, admire your handiwork, and revel in the fact that you’ve conquered this seemingly daunting project.
Remember, whether it’s for insulation, privacy, or creating a DIY fort, plastic sheeting can be a versatile asset. So the next time you need to hang plastic sheeting from the ceiling, you’ll be armed with the knowledge and skills to tackle it with confidence.
Now go forth, spread the plastic sheeting gospel, and let your ceiling transformation be the talk of the town!
FAQ: How To Hang Plastic Sheeting From Ceiling
Welcome to our complete FAQ guide on hanging plastic sheeting from the ceiling! If you’re embarking on a home improvement project or need to create a temporary barrier in your space, plastic sheeting is an excellent solution. But how do you hang it securely without it coming crashing down? We’ve compiled a list of frequently asked questions to help you navigate this process with ease. So, let’s get started and transform your space like a pro!
What kind of tape do you use to hang plastic sheets
When it comes to hanging plastic sheets, you’ll want to use a tape that provides a strong hold without damaging the surface or leaving residue behind. We recommend using Scotch blue tape. It’s specifically designed for delicate surfaces, making it ideal for attaching plastic sheeting to walls or ceilings. With its gentle yet secure grip, you can have peace of mind knowing your plastic sheets will stay put.
What are plastic drop sheets best suited for
Plastic drop sheets are incredibly versatile and have numerous applications. They are best suited for protecting surfaces during painting, home renovations, or any task that may create a mess. Whether you’re repainting a room, sanding furniture, or even crafting with messy materials, plastic drop sheets are your trusty companion in preventing unwanted splatters and spills from causing damage.
Will painter’s tape hold up plastic sheeting
While painter’s tape is perfect for delicate surfaces when it comes to painting or creating clean lines, it may not be the best option for hanging plastic sheeting. Painter’s tape isn’t designed for heavy-duty applications and may struggle to hold the weight of the plastic. For a more reliable solution, opt for the tried and tested Scotch blue tape mentioned earlier.
How do you hang plastic sheeting from the ceiling
Hanging plastic sheeting from the ceiling may sound like a challenging task, but fear not! Follow these steps to achieve a secure and professional-looking installation:
Step 1: Prepare your materials
- Gather your plastic sheeting, tape (such as Scotch blue tape), and a ladder to reach the ceiling.
Step 2: Measure and cut
- Measure the length and width you need for your plastic sheeting and cut it accordingly. Make sure to leave a bit of excess material for a better hold.
Step 3: Attach the sheeting
- Starting from one corner of the ceiling, secure the plastic sheeting using tape. Apply the tape on both the plastic and the ceiling surface, ensuring a firm connection.
Step 4: Repeat as needed
- Continue attaching the plastic sheeting across the ceiling, overlapping each section slightly for better coverage and stability.
Is OSB better than Zipboard
Both OSB (Oriented Strand Board) and Zipboard have their unique advantages. OSB is generally more affordable, making it a popular choice for construction projects. On the other hand, Zipboard offers increased energy efficiency, superior moisture resistance, and ease of installation. Ultimately, the choice between OSB and Zipboard depends on your specific needs, budget, and project requirements.
How do you hang dust control plastic
Dust control plastic is a valuable tool for containing dust during construction or renovation projects. To hang it effectively, follow these steps:
Step 1: Gather your materials
- You’ll need dust control plastic, tape (such as Scotch blue tape), and a ladder.
Step 2: Measure and cut
- Measure the length and height of the area you need to cover and cut the dust control plastic accordingly, ensuring a snug fit.
Step 3: Attach the plastic
- Starting from one corner, secure the plastic to the walls or ceiling using tape. Be sure to tape both the plastic and the surface for a secure hold.
Step 4: Repeat as necessary
- Continue attaching the dust control plastic across the desired area, ensuring proper overlap to create a continuous barrier against dust.
What is a zip wall
A zip wall is a clever system used in construction and renovation projects to create dust barriers quickly. It consists of spring-loaded poles that extend from floor to ceiling with plastic sheeting attached to them. The plastic sheeting has zipper openings, allowing easy access while maintaining a sealed environment. Zip walls are practical, efficient, and highly effective in controlling dust and debris.
Can you sew tarps together
Absolutely! Sewing tarps together is a fantastic way to create a larger tarp or customize the size to fit your specific needs. Using a heavy-duty sewing machine and a strong thread (such as nylon or polyester), you can stitch tarps together to form a seamless and resilient barrier against the elements. Just make sure to align the tarps evenly before sewing and reinforce the seams for added durability.
How do I protect my room from dust
Dust can wreak havoc during home improvement projects, but fear not, we’ve got you covered! Follow these practical tips to protect your room from dust:
Clean and remove debris:
- Clear the room of any loose items or furniture that can collect dust during the project. Sweep or vacuum the area thoroughly before you begin.
Sealing off the room:
- Close doors and windows securely to prevent dust from entering or escaping the room. Use plastic sheeting and tape to cover any openings or vents.
Use dust barriers:
- Hang plastic sheeting using tape (such as Scotch blue tape) to create a barrier between the work area and the rest of the room. This will help contain dust and minimize its spread.
Does electrical tape stick to plastic
Certainly! Electrical tape is known for its adhesive strength and versatility. It adheres securely to a wide variety of surfaces, including plastic. So, if you find yourself needing to attach or repair plastic items, electrical tape is an excellent choice. Just make sure to clean the plastic surface before applying the tape for optimal adhesion.
How do you hang plastic sheeting on the wall
If you’re looking to hang plastic sheeting on the wall, follow these simple steps:
Step 1: Gather your materials
- Prepare your plastic sheeting, tape (such as Scotch blue tape), and a ladder (if necessary).
Step 2: Measure and cut
- Measure the desired length of plastic sheeting and cut it to fit your wall.
Step 3: Secure the sheeting
- Starting from one corner, attach the plastic sheeting to the wall using tape. Apply tape along both the plastic and the wall surface to ensure a firm hold.
Step 4: Repeat as needed
- Continue attaching the plastic sheeting across the wall, overlapping each section slightly for better coverage and stability.
Does duct tape stick to plastic sheeting
While duct tape is known for its sturdy and adhesive properties, it may not be the best option for sticking to plastic sheeting. The adhesive on duct tape can sometimes leave residue behind or damage certain types of plastic. For a more reliable and safe option, we recommend using Scotch blue tape, which is specifically designed for delicate surfaces and holds up well on plastic sheeting.
How do you attach drop cloth to the ceiling
Attaching a drop cloth to the ceiling is easier than you might think. Follow these steps for a hassle-free installation:
Step 1: Prepare your materials
- Gather your drop cloth, tape (such as Scotch blue tape), and a ladder.
Step 2: Measure and cut
- Measure the length and width needed for your drop cloth, ensuring it will sufficiently cover the desired area.
Step 3: Hang the drop cloth
- Starting from one corner of the ceiling, secure the drop cloth using tape. Apply the tape to both the cloth and the ceiling surface for a secure hold.
Step 4: Extend and adjust
- Extend the drop cloth across the ceiling, overlapping the sections slightly, and use additional tape to ensure a seamless connection between each piece. Adjust as necessary to achieve a smooth and even coverage.
Can Gorilla tape be used on plastic
Yes, Gorilla tape can be used on plastic! Gorilla tape is known for its exceptional strength and durability. It bonds with various surfaces, including plastic, forming a reliable and long-lasting hold. Whether you’re repairing a broken item, creating a temporary fix, or securing plastic sheeting, Gorilla tape is up to the task.
How do you hang a tarp with grommets
Hanging a tarp with grommets is a breeze! Follow these simple steps for a secure installation:
Step 1: Prepare your materials
- Gather your tarp, ropes or bungee cords, and something sturdy to attach the ropes or cords to (such as hooks or anchors).
Step 2: Position the tarp
- Lay the tarp flat and align it with the desired space, making sure it covers the area you want to protect.
Step 3: Loop and secure
- Thread one end of the rope or bungee cord through a grommet hole in the tarp. Loop it around the hook or anchor, ensuring a tight and secure connection. Repeat for each grommet, evenly distributing the tension.
Step 4: Test and adjust
- Give the tarp a gentle tug to ensure it’s secure. If needed, readjust the ropes or cords to tighten any loose areas and ensure maximum protection.
How do you keep drywall dust from getting everywhere
Drywall dust has a knack for spreading everywhere, but fear not, we have some tricks up our sleeves to help you control it:
Step 1: Create a containment area
- Hang plastic sheeting using tape (such as Scotch blue tape) to create a barrier between the workspace and the rest of the area. This will prevent dust from traveling too far.
Step 2: Use a dust barrier system
- Consider setting up a zip wall system, which creates a sealed and enclosed workspace, allowing you to tackle the project while minimizing dust spread to other parts of the room.
Step 3: Ventilation and air filtration
- Open windows or use fans to create airflow, directing dust particles away from the work area. Additionally, using air purifiers or dust filters can help capture finer particles and improve overall air quality.
How do you attach plastic to a crawl space wall
Attaching plastic to a crawl space wall is crucial for moisture control and insulation. Follow these steps to get the job done:
Step 1: Clean and prepare the area
- Remove any debris or loose material from the crawl space wall. Ensure the surface is clean and dry before proceeding.
Step 2: Measure and cut the plastic
- Measure the height and width of the crawl space wall and cut the plastic sheeting accordingly, leaving a little excess for better coverage.
Step 3: Apply adhesive or tape
- Using an appropriate adhesive or tape designed for your specific type of plastic, attach the plastic sheeting to the wall, ensuring a tight and secure bond. Follow the manufacturer’s instructions for the best results.
Step 4: Smooth and seal
- Smooth out any wrinkles or creases in the plastic and make sure it is tightly adhered to the wall. Seal the edges and seams with additional adhesive or tape to prevent moisture infiltration.
Hanging plastic sheeting from the ceiling doesn’t have to be a daunting task. With the right materials, techniques, and a dash of creativity, you can transform your space and keep messes contained. We hope this FAQ guide has provided the answers you were looking for, helping you tackle your projects with confidence. So, grab your plastic sheeting and get ready to hang it like a pro!