Are you tired of paying a fortune at the nail salon for gel nails? Well, you’re in luck because DIY gel nails are totally doable! But here’s the best part: you can achieve salon-worthy gel nails without having to go through the tedious task of buffing your nails. Yes, that’s right – say goodbye to hours spent roughing up the surface of your nails!
In this comprehensive guide, we’ll answer all your burning questions about DIY gel nails without buffing. From the must-have supplies to the step-by-step process, we’ve got you covered. Plus, we’ll explore alternative methods, provide tips for a flawless application, and address common concerns about the potential damage gel nails may cause.
So whether you’re a nail polish aficionado or a nail newbie, get ready to unleash your inner nail artist and achieve stunning gel nails without the need for buffing. Let’s dive in and discover the secrets to a long-lasting, professional-looking gel manicure right from the comfort of your own home!
Can I DIY Gel Nails Without Buffing It
So, you’ve seen those fabulous gel nails on every fashion influencer’s Instagram feed, and now you’re itching to try it yourself. But here’s the catch—you’re not a pro, and the thought of buffing your nails terrifies you. Well, fear not! In this section, we’ll explore whether you can DIY gel nails without buffing them. And hey, keep those nail files at bay, because we’ve got some exciting news for you!
The Art of Gel Nails Without Buffing
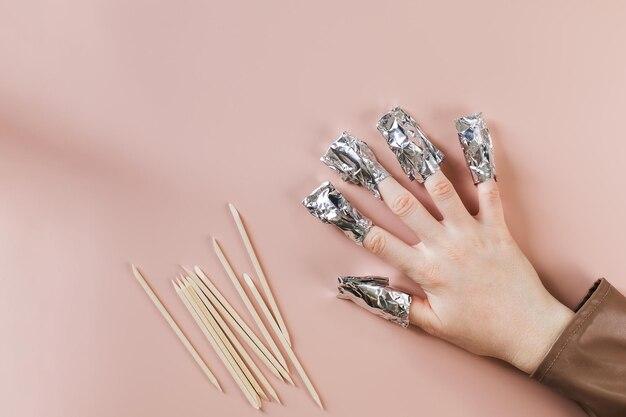
1. Prepping Your Nails
Before we dive into the no-buffing realm, let’s discuss the essential first steps of any gel nail application. Start by gently pushing back your cuticles using a cuticle pusher. Remember, darling, we’re aiming for tidy and clean nails that are ready to flaunt!
2. Clean, Clean, Clean!
Next up is cleaning your nails. Grab a lint-free wipe and some alcohol-based nail cleanser to remove any oils or residue from your nails. This step ensures better adhesion and a flawless, long-lasting gel manicure. Hint: It’s like giving your nails a spa day before the glam session!
3. Base Coat Magic
Now, onto the main star of the show—the base coat! Apply a thin layer of your favorite gel base coat onto your clean nails. Here’s a little secret: some base coats are specially formulated to be applied sans buffing. Look for those magical treasures, and you’ll be on your way to achieving gel perfection without the fuss!
4. Gel Polish Time
Here’s where the fun begins! Grab your favorite gel polish shade and carefully apply it on top of your base coat. Remember to go slow and steady, avoiding your cuticles and skin as much as possible. Pro tip: To prevent a messy application, try using a smaller brush or a nail corrector pen for any slip-ups. Oh, and don’t forget to cure each layer under a gel lamp for the recommended duration—you want those gorgeous colors to stay put, right?
5. Top It Off
To seal the deal and give your nails the ultimate glossy finish, apply a top coat. Look for a gel top coat that’s formulated to be used without buffing for a hassle-free experience. Once you’ve carefully coated your nails, it’s time to let that top coat shine under the lamp! And voilà! Your DIY gel nails are complete, with no need to suffer through the dreaded buffing process.
Now You’re Buff-Free and Fabulous!
Who says you need to endure the tedium of nail buffing to achieve stunning gel nails? With the right products and a touch of DIY magic, you can rock those glossy, chip-resistant nails without any hassle. Say goodbye to the unnecessary buffing blues and hello to a nail routine that’s entertaining, captivating, and most importantly, hassle-free!
So go ahead, darling, take matters into your own hands and embrace the art of DIY gel nails—buffing-free! Whether you’re a seasoned nail enthusiast or a complete beginner, this no-buffing technique will become your new favorite in no time. Get ready to flaunt fabulous gel nails that will leave everyone wondering, “Did she really do that herself?”
FAQ: Can I DIY Gel Nails Without Buffing It
Welcome to our comprehensive FAQ section on DIY gel nails without buffing! We understand that you may have plenty of questions when it comes to achieving a flawless gel manicure at home. Don’t worry; we’ve got you covered. In this FAQ, we will address some of the most common queries and provide you with all the information you need to achieve stunning gel nails without the hassle of buffing. So, let’s dive right in!
Are Nail UV Lights Safe Reddit
Using UV lights for gel nails is generally safe when following the manufacturer’s instructions and taking the necessary precautions. However, it is essential to keep in mind that prolonged and excessive exposure to UV light can potentially lead to skin damage. To minimize any risks, you can consider using LED lamps, which emit less UV radiation compared to traditional UV lamps.
Is it Better to Get Gel or Regular Polish on Acrylic Nails
While both gel and regular polish can be used on acrylic nails, gel polish tends to offer longer-lasting results and a shinier finish. Gel polish is cured under UV or LED light, providing a more durable and chip-resistant manicure. Regular polish, on the other hand, may require more frequent touch-ups and is generally not as long-lasting on acrylic nails.
Do You Need to Buff Nails Before Applying Gel
Contrary to popular belief, you can achieve stunning gel nails without the need for buffing. Buffing is typically done to remove the shine from natural nails and create a rough surface for better adhesion. However, there are now gel polishes available that can adhere directly to the natural nail without the need for buffing. This saves you both time and effort while still achieving fabulous results.
What Do I Need to Start Doing Gel Nails
To start your DIY gel nail journey, you will need a few essential supplies. Here’s a quick rundown:
- Gel polish: Choose high-quality gel polishes in your favorite shades.
- Base coat: A gel base coat helps with adhesion and protects your natural nails.
- Top coat: A gel top coat adds shine and extends the life of your manicure.
- UV or LED lamp: This is used to cure the gel polish.
- Nail file and buffer: These are optional, depending on your preferred technique.
- Rubbing alcohol: Use this to cleanse your nails and remove any residue before application.
- Cuticle oil: Hydrates and nourishes your cuticles.
With these supplies in hand, you’ll be ready to create stunning gel nails from the comfort of your own home!
How Can I Make My Nails Smooth Naturally
If you prefer a more natural approach to achieving smooth nails, here are a few simple tips:
- Moisturize regularly: Apply a nourishing cuticle oil or hand cream to keep your nails and cuticles hydrated.
- Gently file nails: Use a soft nail file to shape your nails and smooth any rough edges.
- Buff with a chamois buffer: A chamois buffer can help polish and add shine to your natural nails without damaging them.
- Maintain a healthy diet: Nourish your nails from within by consuming foods rich in vitamins, minerals, and proteins.
Remember, healthy nails are the foundation for any fabulous manicure!
What Can I Use Instead of Gel Base Coat
If you’re looking for an alternative to gel base coat, you can try using a rubber base coat. Rubber base coats provide excellent adhesion and flexibility, ensuring your gel polish lasts longer without lifting or chipping. They can be a great option for those who prefer to skip the buffing step.
Can You Do Nails Without a Qualification
Absolutely! You don’t need any formal qualifications to do your own nails or experiment with gel polish at home. The beauty of DIY nail care is that anyone can give it a go and unleash their creativity. With practice and some helpful tips, you’ll be on your way to achieving salon-worthy results in no time.
How Do You Dry Gel Nail Polish Without a UV Light
While a UV or LED lamp is typically used to cure gel polish, there are a few alternative methods to dry gel nail polish without one. Some DIY enthusiasts suggest using a gel polish drying spray or a gel top coat that can be air-dried. These methods may not always provide the same long-lasting results as curing under UV or LED light, but they can be handy in a pinch.
How Can I Do Gel Nails at Home
Achieving beautiful gel nails at home is easier than you may think. Follow these steps for a successful DIY gel manicure:
- Prep your nails: Shape, push back cuticles, and gently buff the nail surface.
- Cleanse your nails: Use rubbing alcohol or nail cleanser to remove any residue or oils.
- Apply a thin layer of gel base coat: Be sure to cover the entire nail surface and seal the edges.
- Cure the base coat: Follow the manufacturer’s recommended curing time using a UV or LED lamp.
- Apply thin coats of gel polish: Start with a thin brush and apply the polish in smooth, even strokes. Cure each layer under the lamp before applying the next coat.
- Finish with a gel top coat: Apply a thin layer of top coat to seal and add shine. Cure once again.
- Cleanse your nails: Remove any sticky residue with a cotton pad and rubbing alcohol.
- Moisturize your cuticles: Apply cuticle oil to nourish and hydrate.
With practice, you’ll become a pro at creating stunning gel nails from the comfort of your own home!
Why Are My Gel Nails Sticky
If your gel nails are sticky even after curing, it could be due to a few reasons. First, ensure that you are applying thin, even coats of gel polish. Thick layers are more likely to remain sticky. Additionally, be sure to cure each layer for the recommended time. Insufficient curing can leave your nails tacky. If you’re still experiencing stickiness, try using a gel cleanser or rubbing alcohol to remove the residue.
Can You Apply Gel Polish Without Buffing
Yes, it is possible to apply gel polish without buffing. There are now gel polishes available that adhere directly to the natural nail, bypassing the need for buffing. This saves time and effort while still providing long-lasting and vibrant results. Simply ensure your nails are clean and free from any oils or residue before application.
What Can I Use Instead of a Buffer
If you prefer to skip using a buffer, you can try using a chamois buffer or a gentle nail file to smooth and polish your nails. These alternatives can help achieve a glossy, natural shine without the need for aggressive buffing.
Are Gels Bad for Your Nails
When applied and removed correctly, gel nails are not inherently bad for your nails. However, improper application or removal can cause damage. It is crucial to follow proper techniques, avoid peeling off gel polish, and give your nails breaks between manicures to maintain their health and strength.
How Do You Apply Gel Nail Polish Perfectly
To achieve a flawless gel nail application, keep these tips in mind:
- Prepare your nails properly: Clean, shape, and gently buff your nails to create a smooth surface for optimal adhesion.
- Apply thin coats: Avoid applying thick layers of gel polish, as this can lead to uneven curing and a less durable manicure.
- Cap the edges: Ensure to seal the free edge of your nail with each coat to minimize chipping.
- Cure under the lamp: Take the time to cure each layer of gel polish properly according to the recommended times.
- Finish with a gel top coat: Apply a thin layer of top coat to add shine and extend the life of your manicure.
- Cleanse and moisturize: Remove any sticky residue using rubbing alcohol or gel cleanser, then moisturize your cuticles to keep them hydrated.
With practice, you’ll be able to achieve a salon-quality gel manicure right at home!
What Supplies Do I Need to Do My Own Acrylic Nails
For an at-home acrylic nail experience, gather the following supplies:
- Acrylic nail tips: Choose the desired nail shape and size.
- Nail adhesive: Use adhesive made specifically for acrylic nails to secure the tips.
- Acrylic nail powder: Opt for high-quality powders in various shades for customization.
- Monomer liquid: This is used to activate the acrylic powder and create the nail’s solid structure.
- Acrylic brush: A brush with synthetic bristles is ideal for applying the liquid and powder mixture.
- Nail file and buffer: These tools are necessary for shaping, smoothing, and refining the acrylic nails.
- Cuticle pusher: Use this tool to gently push back your cuticles before application.
- Nail forms: If you prefer sculpted nails instead of using tips, nail forms can help create the desired shape.
- Clear top coat: Apply this after creating your acrylic nails for extra shine and protection.
- Acrylic nail liquid dispenser: This container helps control the flow of the monomer liquid, making it convenient to work with.
These supplies will provide you with everything needed to experiment with acrylic nails and unleash your creativity!
Do You Wipe Gel Nails Between Coats
Yes, wiping or “cleansing” gel nails between coats is an essential step for achieving a flawless manicure. After curing each layer of gel polish, use a cotton pad soaked in rubbing alcohol or gel cleanser to remove the tacky or sticky residue. This step ensures a smooth surface and optimal adhesion for subsequent coats.
Do You Shake Gel Nail Polish
No, shaking gel nail polish is not recommended. Unlike regular polish, gel polish can develop air bubbles when shaken vigorously. Instead, gently roll the bottle between your palms to mix the gel polish thoroughly without introducing air bubbles.
What Can I Use as a Substitute for a Nail Buffer
If you can’t get your hands on a nail buffer, there are a few household items that can serve as substitutes:
- Soft cloth: Use a clean, lint-free cloth to gently buff your nails and achieve a natural shine.
- Chamois buffer: This tool offers a smooth and glossy finish without damaging the nail surface.
- High-grit nail file: Opt for a nail file with a high grit count to gently smooth your nails.
Remember, the goal is to achieve a smooth surface without harshly stripping away layers of your nails.
Does Gel Ruin Your Nails Reddit
When done correctly and with proper care, gel polish should not ruin your nails. However, improper application, excessive scraping during removal, or a lack of breaks between manicures can lead to damage. To maintain healthy nails, make sure to follow best practices, give your nails time to breathe between gel manicures, and nourish them with moisturizers and cuticle oil.
Do You Have to Buff Nails Before Gel Reddit
Buffing before applying gel polish is not always necessary. Nowadays, gel polishes are available that adhere well to the natural nail without the need for buffing. This saves time and effort while still providing a professional-looking manicure. However, it’s essential to properly cleanse and prep your nails before application to ensure the best adhesion and longevity.
That wraps up our FAQ section on the topic of DIY gel nails without buffing. We hope we’ve answered all your burning questions and provided you with the information needed to achieve fabulous gel nails at home. Now it’s time to unleash your creativity, embrace the fun, and enjoy your stunning DIY gel manicures in style!